Taro recipes: Vegan-Friendly Recipes and Health Benefits of Taro
Recipe List
Introduction
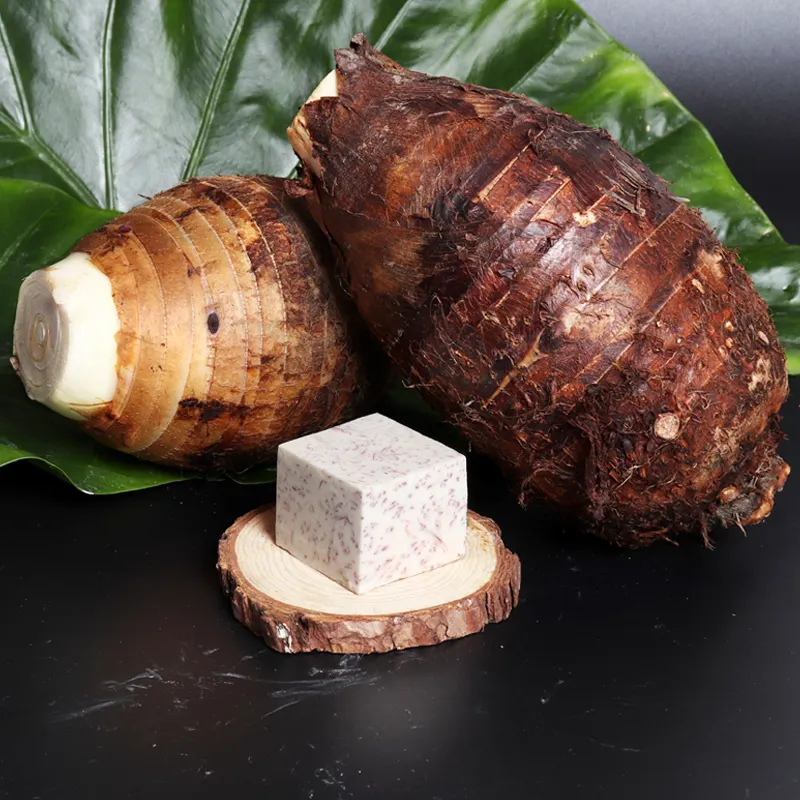
In the world of plant-based cuisine, taro emerges as a captivating ingredient that offers not only delightful flavors but also a host of health benefits. Taro, with its nutty and earthy taste, has long been cherished by vegetarian enthusiasts for its versatility and rich nutritional profile. Packed with essential nutrients like fiber, vitamins, and minerals, taro supports digestive health, boosts immunity, and aids in maintaining healthy skin and vision. This article presents 5 delicious taro recipes, all of which are vegan.
In this culinary exploration, we delve into the delectable realm of taro recipes, catering to the needs of individuals seeking vegetarian options as part of their dietary preferences. We address common concerns and challenges associated with taro consumption, such as its alkaloid content, offering handy tips to ensure safe and enjoyable culinary experiences. Additionally, we present an array of tantalizing taro recipes that cater to diverse palates, providing both traditional and innovative ways to savor this beloved root vegetable.
Our mission is to inspire and empower the plant-based community to embrace taro as a delectable and nourishing addition to their diets. With a collection of meticulously curated taro root recipes, we celebrate the gastronomic pleasures of taro, demonstrating its significance in both vegan and diet-conscious lifestyles.
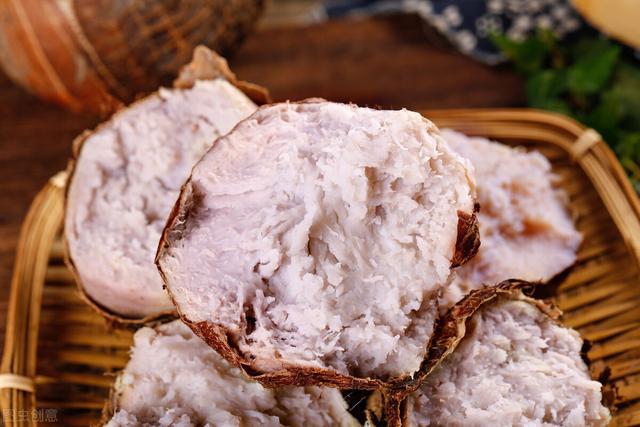
1. Steamed Taro
This taro recipe will take you indulge in the delightful flavors of Steamed Taro, a mouthwatering vegan recipe that will captivate your taste buds! This easy-to-follow recipe showcases the soft and tender taro, perfectly steamed to perfection. Topped with a sprinkle of granulated sugar, it offers a delightful balance of sweetness and earthy goodness. Whether you’re a seasoned vegetarian or exploring plant-based options, this delectable dish is sure to become a cherished favorite in your meatless culinary repertoire. Enjoy the wholesome satisfaction of this Steamed Taro, making vegan cooking a true gastronomic pleasure!
Ingredients:
| Taro | 250g |
| Granulated sugar | as needed |
Method:
- Peel and clean the taro.
- Cut the taro into strips.
- Place the taro in a steamer. Steam on high heat until the water boils, then continue steaming for 20 minutes.
- Remove the taro from the steamer and sprinkle with granulated sugar according to personal taste. Done!
Summary:
Choose a taro variety that becomes soft and tender after steaming. When peeling the taro, it is recommended to either place it in water or wear gloves to prevent itching caused by the alkaloids released by the taro.
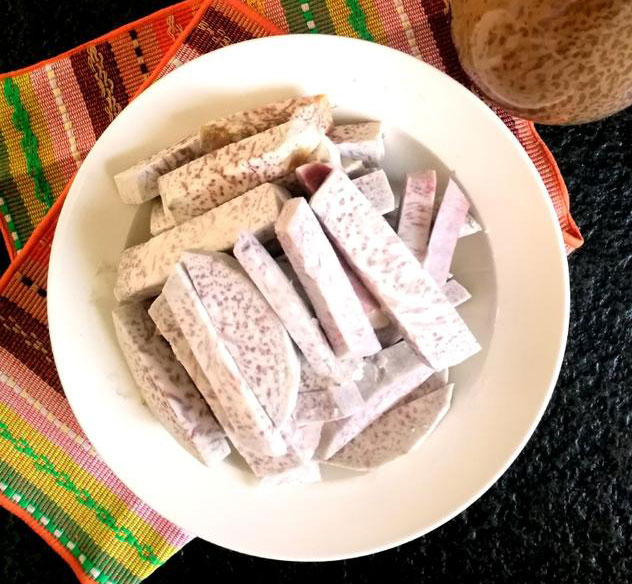
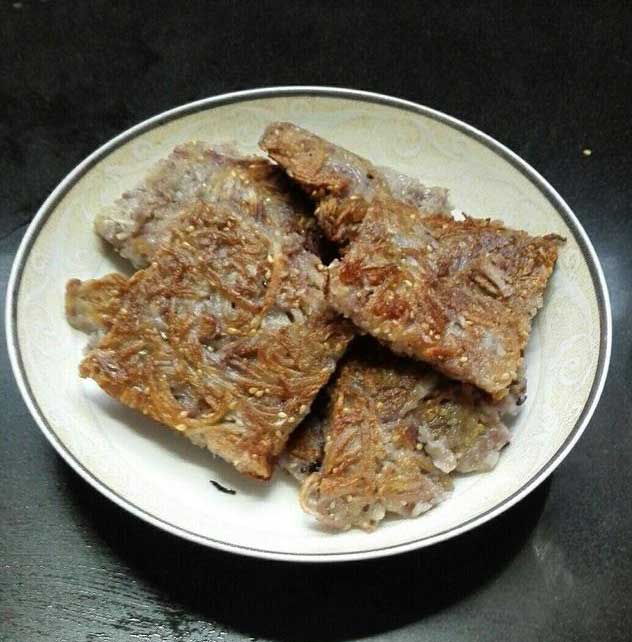
2. Shredded Taro Pancake
Savor the delectable flavors of Shredded Taro Pancake, a delightful vegetarian recipe that will tantalize your taste buds! Thin strips of taro are perfectly seasoned with a blend of sesame seeds, mushroom powder, and a hint of sweetness. Encased in a crispy rice flour coating, these shredded Taro are steamed to perfection and pan-fried to golden perfection. Easy to make and incredibly satisfying, this Shredded Taro Pancake is a delightful addition to any vegetarian culinary repertoire. Elevate your plant-based cooking with this mouthwatering treat, making vegetarian cuisine an exquisite culinary journey!
Ingredients:
| Taro | 500g |
| Rice flour | 80g |
| Oil | 30g |
| Toasted sesame seeds | 20g |
| Salt | 4g |
| Granulated sugar | 2g |
| Mushroom powder | 1 teaspoon |
Method:
- Peel the taro and shred it into thin strips. Place the taro strips in a container.
- Add salt, sugar, mushroom powder, sesame seeds, and rice flour to the taro strips. Mix well to ensure that each strip is coated with rice flour.
- Brush oil on the surface of a steaming tray and place the taro strips in it.
- Arrange the taro strips flat and press them with your hands to make them stick together.
- Place the taro strips in a steamer. Steam on high heat until the water boils, then continue steaming for 30 minutes.
- Remove the steaming tray and let it cool to room temperature. Take out the taro strips and cut them into square-shaped pieces for easy consumption.
- Heat oil in a pan until it starts to smoke. Add the taro rice flour squares and fry on low heat until golden brown on both sides. Done!
Summary:
In step 1, take precautions to protect your hands when handling the taro. If the rice flour doesn’t stick well to the taro strips in step 2, you can spray a small amount of water mist using a spray bottle. If the taro strips are still not sticking well after being pressed in step 4, it may be due to dry rice flour. You can spray a little water mist with a spray bottle. Cooling in step 6 is necessary for the rice paste to solidify. At this stage, the taro rice flour squares are ready to be eaten. Step 7 can be omitted according to personal preference.
Note that in this recipe, rice flour is used, not glutinous rice flour.
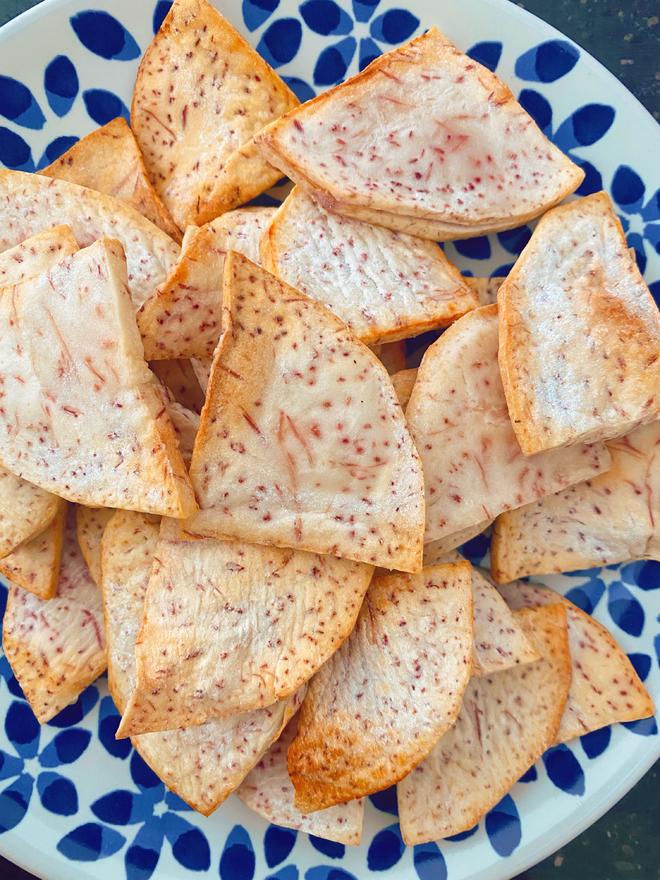
3. Roasted Taro Chip
This taro recipe will Introduce our delectable Roasted Taro Chips – a scrumptious vegan delight that will elevate your taste buds! Crispy taro slices with a perfect handle of salt, sugar, and oil, then air-fried to golden perfection. These chips offer a delightful crunch and a hint of sweetness, making them a mouthwatering choice for all plant-based foodies. Customize with a sprinkle of black pepper to suit your palate. Explore the diverse world of vegetarian cuisine and savor the goodness of our Roasted Taro Chips recipe! Your journey to a flavorful vegan experience starts here.
Ingredients:
| Taro | 250g |
| Salt | 1 tablespoon |
| Sugar | 1 tablespoon |
| Oil | as needed |
Method:
- Peel the taro, slice it, rinse it, and remove the starch on the surface of the taro slices.
- Place the taro slices in water, add salt and sugar, stir well, and soak for 10 minutes. Remove the taro slices and drain off the excess water.
- Brush oil on both sides of each taro slice.
- Place the taro slices in an air fryer, bake at 160°C for 10 minutes. Flip the taro slices and continue baking for 5 minutes. Done.
Summary:
In Step 3, remember to brush oil on both sides of the taro slices. In Step 4, the baking time is just a reference, so adjust it according to the specific situation. You can sprinkle black pepper powder on the taro slices according to personal taste.
4. Icing Taro
This taro recipe will take you to discover the divine fusion of flavors in our Icing Taro recipe! Immerse yourself in the heavenly delight of tender and aromatic taro, glazed with a sweet and crispy icing. This innovative combination offers a tantalizing texture and an unforgettable taste experience. Elevate your vegetarian culinary journey with this delightful masterpiece, proving that plant-based dishes can be both indulgent and delicious. Unleash the essence of taro with our Icing Taro – a delightful adventure for your taste buds. Your new favorite vegan treat awaits!

Ingredients:
| Taro | 300g |
| Granulated sugar | 60g |
| Water | 30g |
| Potato starch | as needed |
| Oil | as needed |
| Scallions | 2 stalk |
Method:
- Peel the taro and cut it into strips. Steam the taro strips in a steamer for 10 minutes.
- Remove the taro from the steamer and let it cool. Coat each side of the taro strips with potato starch.
- Add oil to a pan and heat it. When the oil starts to smoke, add the taro strips and cook over low heat. Constantly flip the taro strips to ensure even heating on all sides.
- Once the surface of the taro strips turns golden brown, remove them from the pan and set aside.
- Clean the pan. Add water and granulated sugar, and heat over high heat. The stages of the sugar syrup are as follows: ① The water boils, and the granulated sugar begins to melt into syrup. ② Continue heating, and the syrup forms large bubbles. ③ Continue heating, and the large bubbles in the syrup turn into smaller, more dense bubbles. This indicates that the syrup has reached the desired temperature.
- Add the taro strips and scallions to the pan, then turn off the heat. Stir-fry rapidly and continuously.
- Keep stir-frying the taro strips until the syrup coats them and solidifies into a glaze.
Summary:
In Step 2, there is no specific quantity of potato starch required; just make sure that each taro slice is coated with potato starch. Add potato starch in small portions, gradually, and mix thoroughly until well-coated.In Step 3, you don’t need too much oil, just enough to cover the bottom of the pan. In Step 5, stir the mixture when the granulated sugar starts to melt to prevent it from sticking to the bottom. The key step in this recipe is Step 5, as the temperature of the syrup affects the texture of the sugar coating after cooling. We want the syrup to cool and solidify into a glaze, which usually occurs at a temperature of around 110-115°C.
5. Clay Pot Taro
This taro recipe will take you to experience the savory symphony of flavors! Indulge in the tender embrace of sliced taro, harmoniously infused with the richness of light soy sauce and vegetarian oyster sauce. The touch of maltose and sesame oil adds a delightful sweetness and depth to this plant-based delight. Slow-cooked in a clay pot, the taro absorbs all the delectable essences, creating a truly satisfying and comforting dish. Unleash the full potential of taro as a versatile and delicious addition to your vegan culinary repertoire. Elevate your taste buds with the captivating goodness of Clay Pot Taro!

Ingredients:
| Taro | 500g |
| Light soy sauce | 2 tablespoons |
| Vegetarian oyster sauce | 1 tablespoon |
| Maltose | 1 tablespoon |
| Sesame oil | 1/2 tablespoon |
| Salt | 2g |
| Green onions | 2 stalks |
| Onion | 1 |
| Water | as needed |
| Tool | Clay pot |
Method:
- Slice the onion and spread it on the bottom of the clay pot.
- Slice the taro into approximately 1cm thick pieces. Arrange the taro slices on top of the onion.
- Mix together light soy sauce, vegetarian oyster sauce, maltose, sesame oil, and salt. Evenly pour the sauce mixture over the taro. Add enough water to the clay pot to submerge about 80% of the ingredients. Cover the pot, heat over high heat until the water boils, then reduce the heat to low and continue cooking for 10 minutes.
- Use a fork to poke the taro. If the texture becomes soft and the fork easily goes through, it means the taro is cooked. Sprinkle chopped green onions on top and it’s done.
Summary:
The cooking time in Step 3 is just a reference, so rely on the actual texture of the taro as indicated in Step 4 to determine if it is cooked thoroughly.
Wholesome Lettuce Recipes: Exploring the Vegan Delights with Lettuce
Dandelion Recipes: A Culinary Journey of Vegan Creativity with Dandelion’s Gastronomic Charm